Hiking and photography are two passions that often go hand-in-hand, allowing you to capture the breathtaking beauty of nature. However, lugging around expensive camera equipment on a challenging trail presents unique challenges. Choosing the right method to carry your camera is crucial for comfort, safety, and accessibility, ensuring you don’t miss that perfect shot. This guide explores various techniques and gear options to help you effectively and safely carry your camera when hiking, allowing you to focus on the journey and the stunning landscapes around you. We’ll delve into the pros and cons of each method, empowering you to make the best decision for your individual needs and hiking style.
Choosing the Right Camera Carrying Method
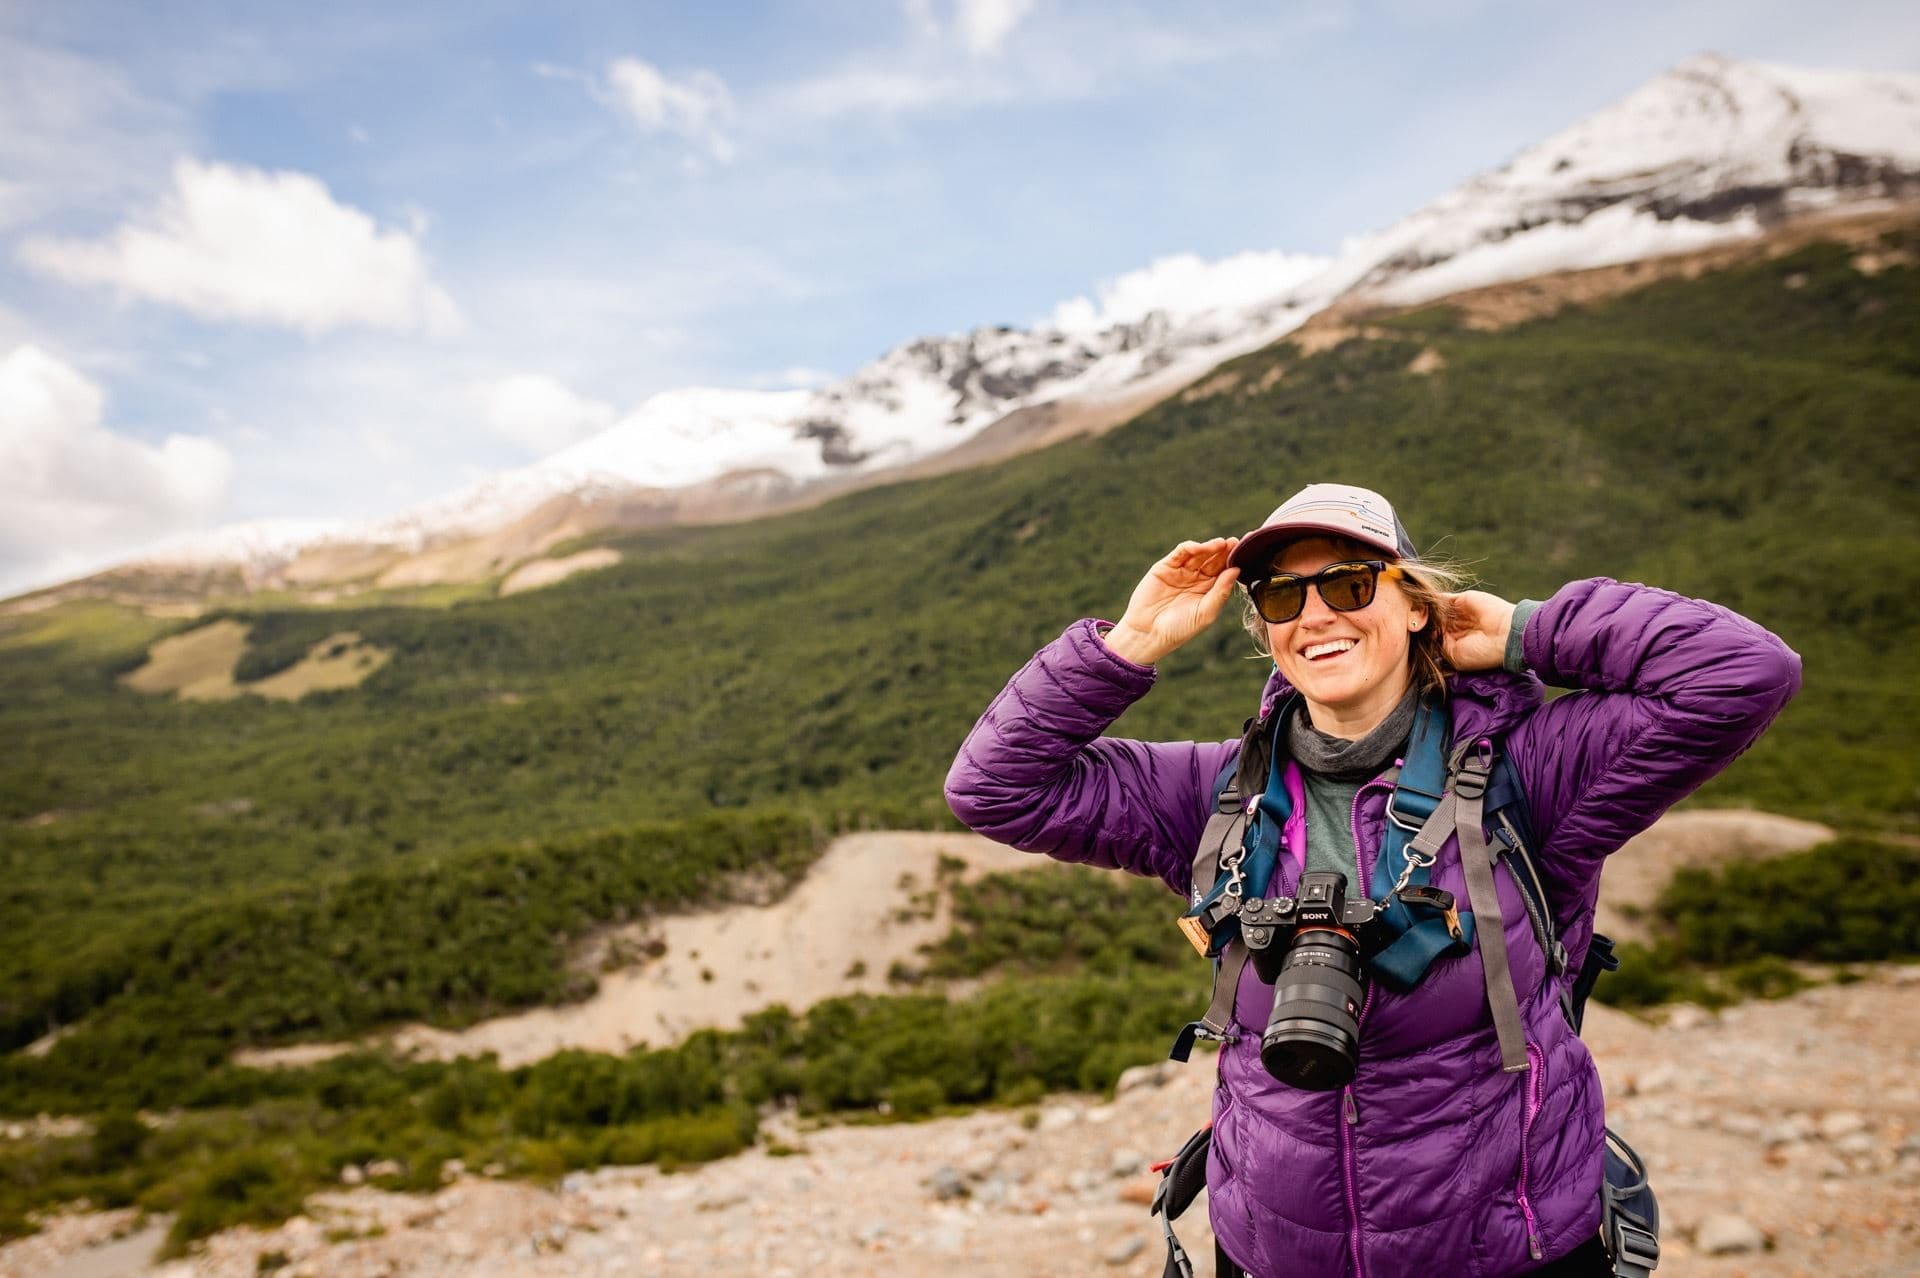
Selecting the optimal way to carry your camera when hiking depends on several factors, including the size and weight of your camera, the type of hiking you’ll be doing, and your personal preferences. Consider these options:
- Neck Strap: A classic choice, but can become uncomfortable on long hikes, causing neck strain. Best suited for shorter, less strenuous hikes.
- Shoulder Strap: Distributes weight better than a neck strap, but can still be cumbersome and swing around while hiking;
- Camera Holster/Clip: Attaches to your belt or backpack strap, providing quick access to your camera. Good for active shooting but offers less protection.
- Camera Backpack: Designed specifically for carrying camera gear, offering padded compartments and comfortable weight distribution. Ideal for serious photographers with multiple lenses and accessories.
- Chest Harness: Keeps the camera secure and accessible on your chest, distributing weight evenly. A great option for active hikers and those who need quick access.
Neck Strap vs. Shoulder Strap: A Quick Comparison
| Feature | Neck Strap | Shoulder Strap |
|---|---|---|
| Weight Distribution | Poor ⏤ concentrates weight on neck | Better ⏤ distributes weight across shoulder |
| Comfort | Low ⏤ can cause neck strain | Moderate ⎻ more comfortable for longer periods |
| Accessibility | Easy ⏤ camera is always within reach | Easy ⏤ camera is readily available |
| Stability | Low ⎻ camera swings around | Moderate ⎻ less swinging than neck strap |
Tips for Safe and Comfortable Camera Carrying
Beyond choosing the right carrying method, consider these tips for a more enjoyable and safe hiking experience:
- Use a Rain Cover: Protect your camera from the elements, especially in unpredictable weather.
- Secure Your Camera: Ensure your camera is securely attached to your chosen carrying system to prevent accidental drops.
- Adjust Straps Properly: Adjust straps for a snug and comfortable fit to distribute weight evenly.
- Consider a Lens Cap Keeper: Prevent losing your lens cap by attaching it to your camera strap.
- Practice Before You Go: Get comfortable with your chosen carrying method before hitting the trail.
Finding the perfect balance between accessibility, comfort, and protection is key. Experiment with different options and see what works best for you. Remember to prioritize safety and comfort, allowing you to fully immerse yourself in the beauty of the natural world and capture stunning photographs along the way;
FAQ: Carrying Your Camera While Hiking
- Q: What’s the best way to protect my camera from rain while hiking?
- A: Use a dedicated rain cover or a waterproof camera bag. You can also use a plastic bag in a pinch.
- Q: How can I prevent my camera from swinging around while hiking?
- A: Choose a carrying method that secures the camera close to your body, such as a chest harness or a camera backpack with adjustable straps.
- Q: What if I need to change lenses frequently?
- A: A camera backpack with quick-access compartments or a camera holster/clip can be helpful.
- Q: Is it safe to carry my camera on a neck strap while hiking?
- A: It’s generally not recommended for long or strenuous hikes, as it can cause neck strain and the camera can swing around.
Ultimately, the best way to carry your camera is the method that allows you to hike comfortably and safely while still having easy access to your equipment. Remember to consider your individual needs and preferences when making your decision. With the right preparation and gear, you can confidently carry your camera when hiking and capture unforgettable moments in the great outdoors.
Maintaining Your Camera Gear on the Trail
Beyond simply carrying your camera, maintaining it in good working order while hiking is paramount. The elements can be harsh, and even a seemingly minor issue can ruin a photo opportunity. Here are some essential maintenance tips:
- Clean Regularly: Dust, dirt, and moisture are your camera’s enemies. Carry a microfiber cloth and lens cleaning solution to wipe down your camera and lenses regularly.
- Protect from Impact: Even with a padded bag, accidental bumps and drops can happen. Be mindful of your surroundings and avoid placing your camera bag in precarious positions.
- Check Battery Life: Cold weather can drain batteries quickly. Carry extra batteries and keep them warm in an inside pocket.
- Monitor Humidity: If hiking in humid conditions, consider using silica gel packets in your camera bag to absorb moisture.
- Inspect Regularly: Take a few moments each day to inspect your camera and lenses for any signs of damage or malfunction.
Troubleshooting Common Camera Issues on the Trail
Even with the best preparation, unexpected issues can arise. Here’s how to handle some common problems:
| Issue | Possible Cause | Solution |
|---|---|---|
| Blurry Images | Camera shake, incorrect focus, dirty lens | Use a tripod, adjust focus settings, clean the lens |
| Dark or Overexposed Images | Incorrect exposure settings | Adjust aperture, shutter speed, or ISO settings |
| Camera Won’t Turn On | Dead battery, loose battery connection | Replace battery, check battery connection |
| Error Message on Screen | Various issues, consult camera manual | Try restarting the camera, check memory card |
Advanced Techniques for Hiking Photography
Once you’re comfortable carrying and maintaining your camera, you can start exploring advanced techniques to elevate your hiking photography:
- Composition: Use the rule of thirds, leading lines, and other compositional techniques to create visually appealing images.
- Light: Pay attention to the quality of light. Golden hour (the hour after sunrise and before sunset) often provides the most beautiful light for landscape photography.
- Filters: Consider using filters, such as polarizing filters or neutral density filters, to enhance your images.
- Panorama: Capture wide-angle views by stitching together multiple images to create a panorama.
- Night Photography: If you’re hiking overnight, try capturing the beauty of the night sky.
Remember to always practice Leave No Trace principles when hiking and photographing in nature. Respect wildlife, stay on marked trails, and pack out everything you pack in. By combining your passion for hiking with your love of photography, you can create stunning images while enjoying the beauty of the natural world. So, get out there, explore, and capture the magic! The journey of learning how to carry your camera is a continuous one, and with each hike, you’ll refine your technique and discover new ways to capture the beauty around you.
